Overview of ReFrame-HPC and feelpp.benchmarking
1. What is feelpp.benchmarking ?
feelpp.benchmarking is a framework designed to automate and facilitate the benchmarking process for any application. It is built on top of ReFrame-HPC, and was conceived to simplify benchmarking on any HPC system. The framework is specially useful for centralizing benchmarking results and ensuring reproducibility.

1.1. Motivation
Benchmarking an HPC application can often be an error-prone process, as the benchmarks need to be configured for multiple systems. If evaluating multiple applications, a benchmarking pipeline needs to be created for each one of them. This is where feelpp.benchmarking comes in hand, as it allows users to run reproducible and consistent benchmarks for their applications on different architectures without manually handling execution details.
The framework’s customizable configuration files make it adaptable to various scenarios. Whether you’re optimizing code, comparing hardware, or ensuring the reliability of numerical simulations, feelpp.benchmarking offers a structured, scalable, and user-friendly solution to streamline the benchmarking process.
1.2. How it works
The framework requires 4 configuration files, in JSON format, in order to set up a benchmark.
- 4 configuration files
-
- System settings (ReFrame)
-
Describes the system architecture (e.g. partitions, environments, available physical memory, devices)
- Machine Specifications
-
Filters the environments to benchmark, specifies access, I/O directories and test execution policies.
- Benchmark/Application Specifications
-
Describes how to execute the application, where and how to extract performance variables, and the test parametrization.
- Figure configuration
-
Describes how to build the generated report’s plots
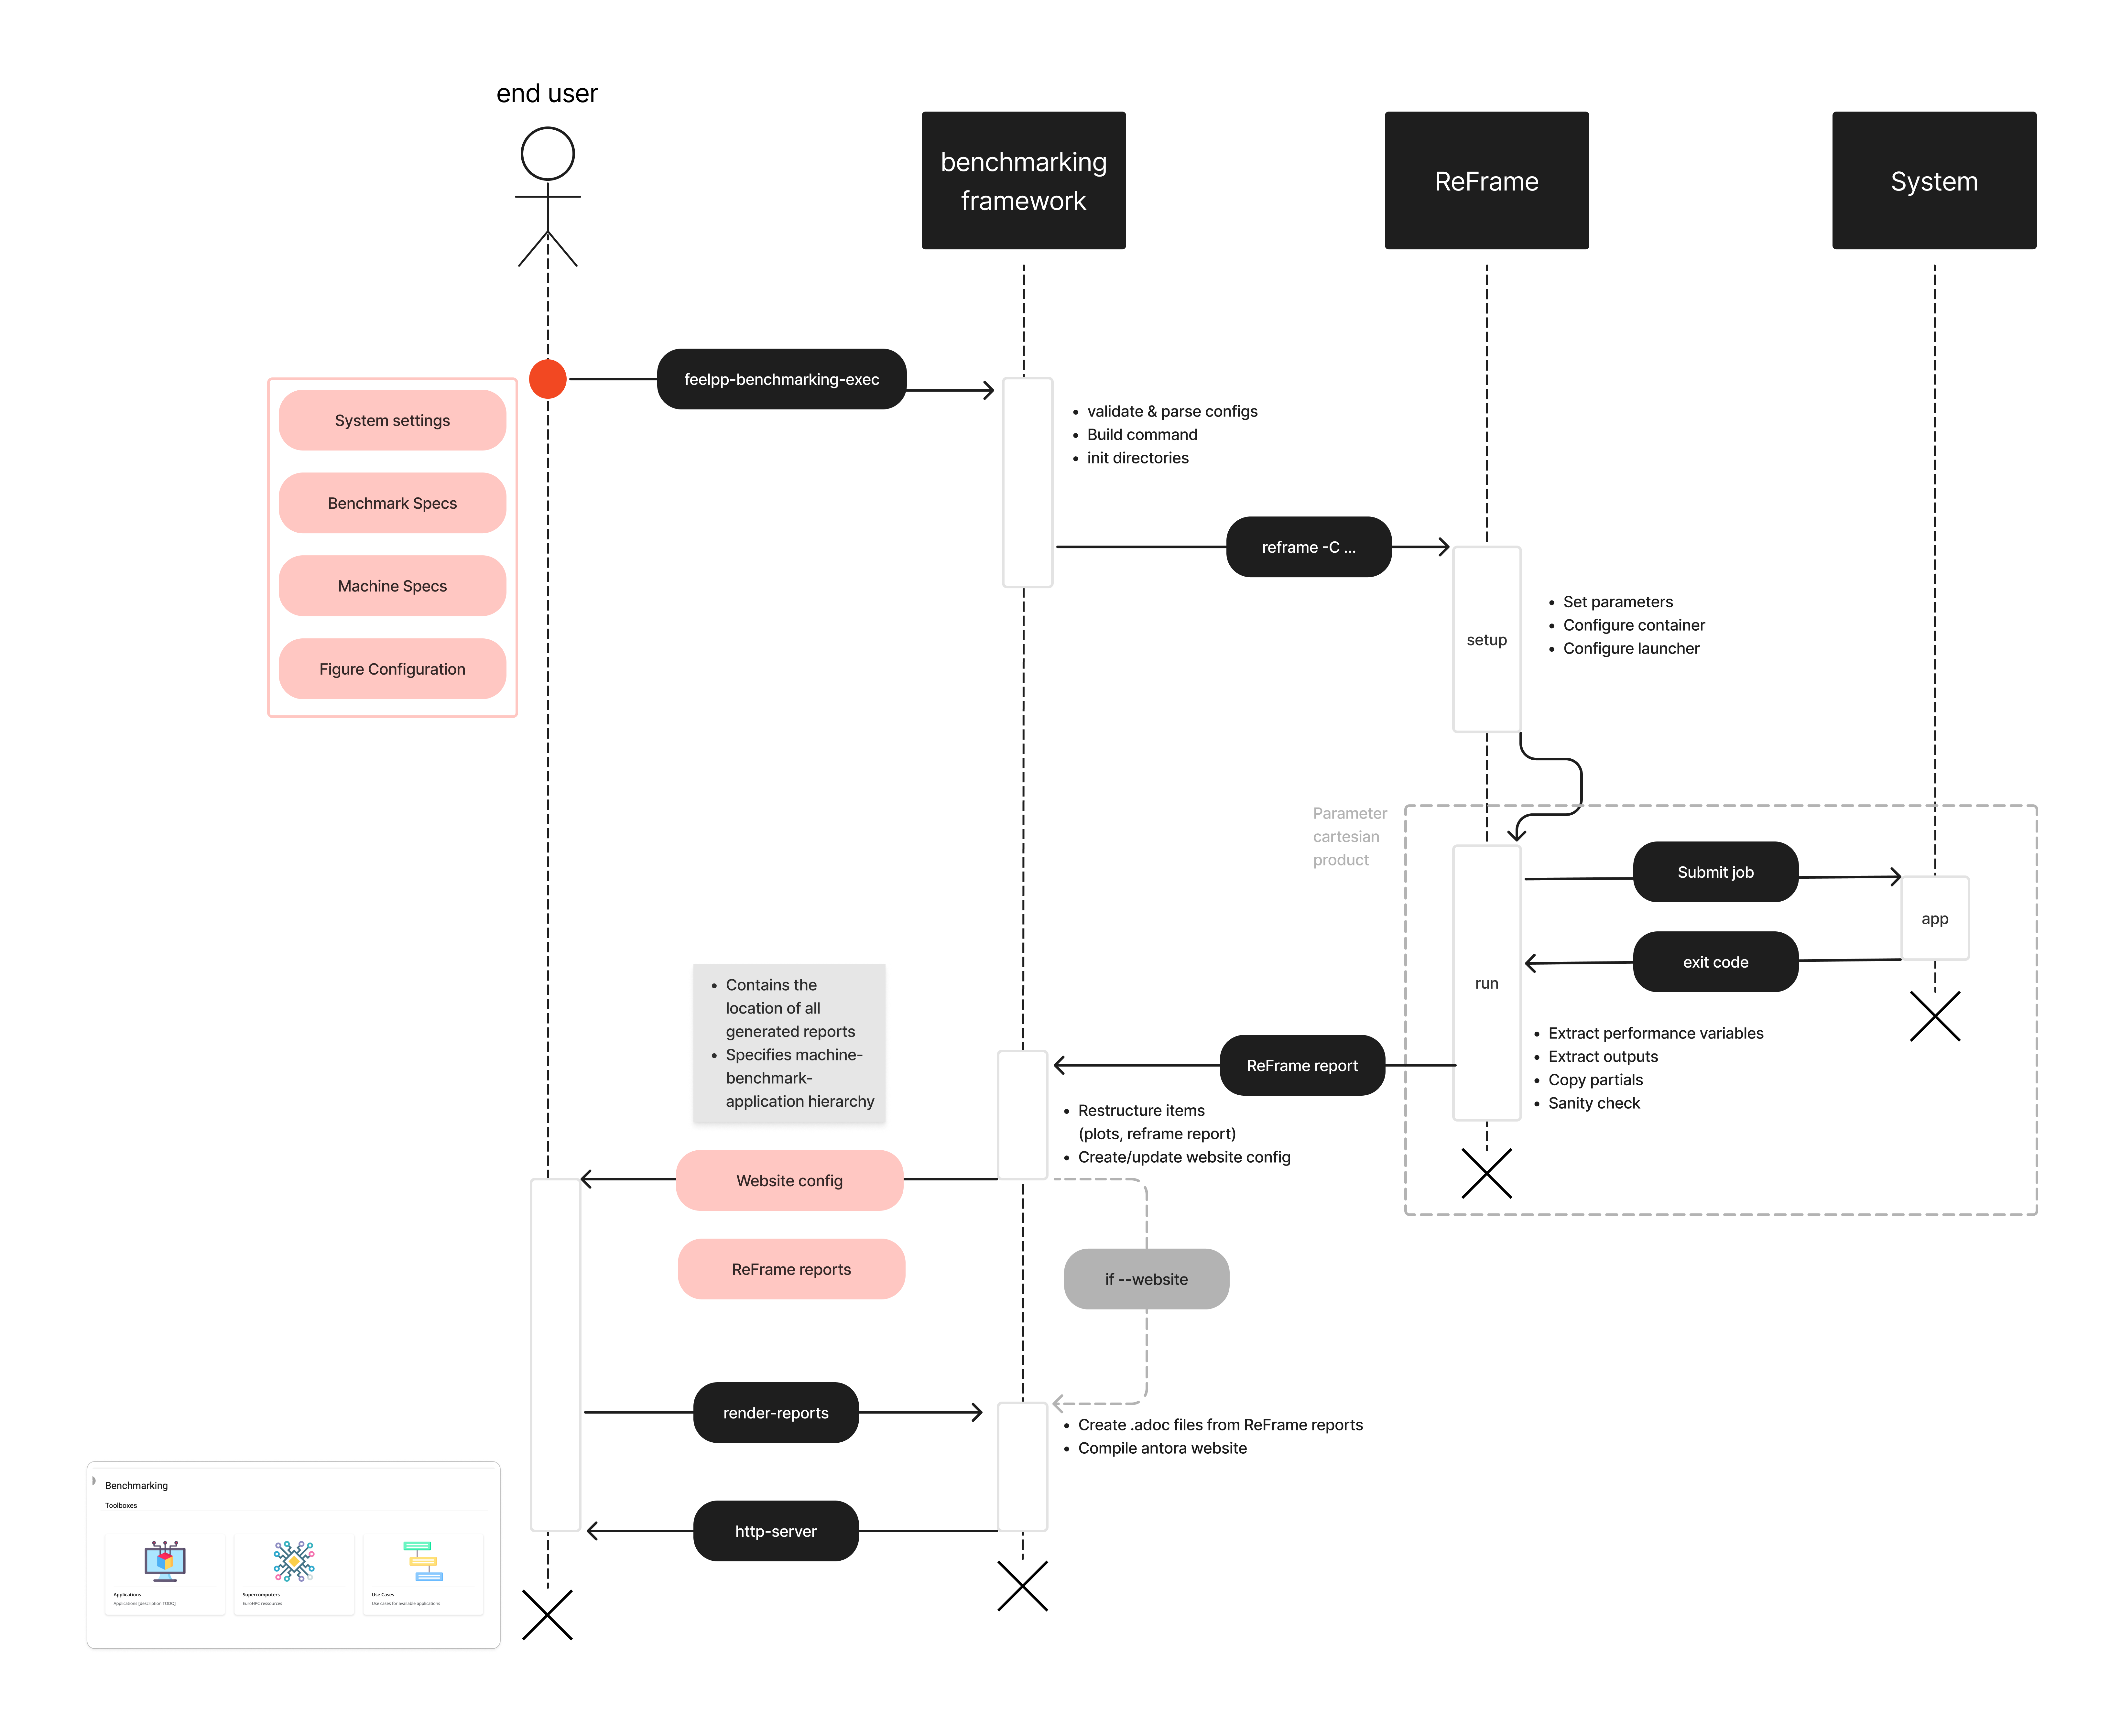
Once the files are built and feelpp.benchmarking is launched, a pre-processing phase begins where configuration files are parse. After this, the ReFrame test pipeline is executed according to the provided configuration.
- Pre-processing stage
-
-
Configuration files are parsed to replace placeholders.
-
If a container image is being benchmarked, this one is pulled and placed on the provided destination.
-
If there are remote file dependencies, they are downloaded to the specified destinations.
-
- ReFrame test pipeline
-
-
The parameter space is created.
-
Tests are dispatched.
-
Computing resources are set, along with specific launcher and scheduler options.
-
Jobs are submitted by the scheduler.
-
Performance variables are extracted.
-
Sanity checks
-
Cleanup
-
Finally, at the end phase of the pipeline, feelpp.benchmarking will store the ReFrame report following a specific folder structure. This will allow the framework to handle multiple ReFrame reports in order to render them in a dashboard-like website.
The diagram figure summarizes the feelpp.benchmarking workflow.

2. What is ReFrame-HPC ?

ReFrame is a powerful framework for writing system regression tests and benchmarks, specifically targeted to HPC systems. The goal of the framework is to abstract away the complexity of the interactions with the system, separating the logic of a test from the low-level details, which pertain to the system configuration and setup. This allows users to write portable tests in a declarative way that describes only the test’s functionality.
2.1. Core features
- Regression testing
-
Ensures that new changes do not introduce errors by re-running existing test cases.
- Performance evaluation
-
Monitors and assesses the performance of applications to detect any regressions or improvements.
- Performance and Sanity checks
-
Automates validation of test results with built-in support for performance benchmarks, ensuring correctness and efficiency.
2.2. Test Execution Pipeline
ReFrame tests go through a pre-defined pipeline where users can customize the what happens in between each step by using decorators (e.g. @run_after("setup")).
-
Setup: Tests are set up for current partition and programming environment.
-
Compile: If needed, the script for test compilation is created and submitted for execution.
-
Run: Scripts associated to the test execution are submitted (asynchronously or sequentially).
-
Sanity: The test outputs are checked to validate the correct execution.
-
Performance: Performance metrics are collected.
-
Cleanup: Test resources are cleaned up.
For those interested in learning more, check out:
-
Official ReFrame Documentation: reframe-hpc.readthedocs.io
-
GitHub Repository: github.com/reframe-hpc
 .pdf
.pdf